
Main interface
Sorting
You can sort the items in both left and right panels in the main view by just clicking on columns header. The second click reverses the order.
You can sort project and tasks in the left panel by any column (and you can show/hide columns using the RIGHT click on columns header - check the the Customizing the Interface video).
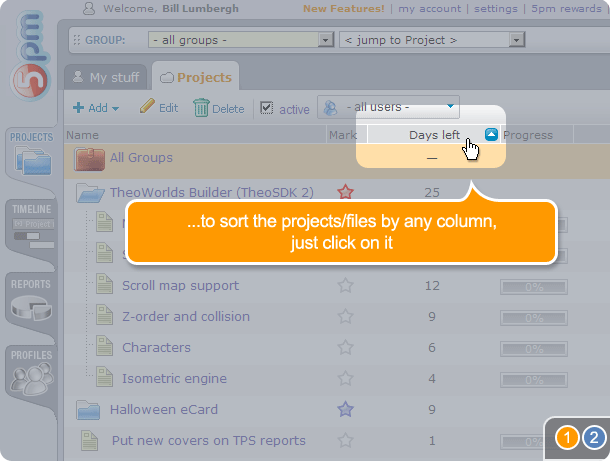
To sort by any column, simply click on that column header. Click again to reverse the order.
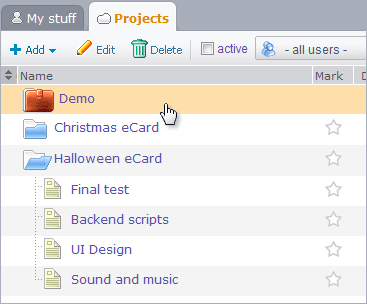
By default the custom sorting order is enabled - last added projects/tasks are on the top. To re-order the projects and tasks - simply drag-and-drop them around. This order is shared and synchronized between all the users.
The custom sorting order is represented by the first column that has up/down arrows on it. You can click on any other column to sort by it. To return to the custom sorting order, just click again on the first column with the arrows icon.
If you try to drag around the items while not in the custom sorting mode, it will ask you if you want to switch back to the custom sorting mode or overwrite it with this new sorting order. The last choice gives you the option to sort all the tasks and projects by deadline, for example, and then create a custom sorting order based on it.
Filters
There are several useful filters available in the main interface. First one is "view" filter - it hides inactive ("closed"or "on hold") projects and tasks.
You can hide all inactive projects and tasks ("done" and "on hold") or you can hide just the ones closed some time ago - it will automatically hide the tasks and projects that have been closed more than XX days ago.
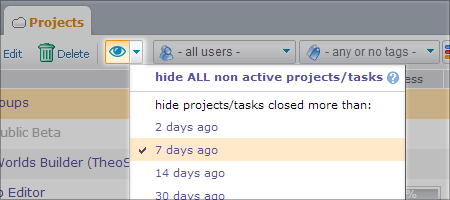
This is an individual filter - it affects only your 5pm view. It can be turned on and off at any time.
You can also filter the projects and tasks by any user (including the clients) using the dropdown filter on the top. When you select an user from this dropdown, the left panel will show just the project and tasks that contain this user in their team (for the clients in will show just the project assigned to them with all the tasks inside). The option "-just mine-" is a quick way to see just your own projects and tasks (the ones that you are part of the team of).
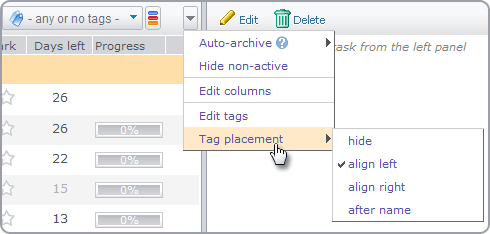
There is also a filter by tags - see below.
These filters are individual (they are remembered for each use separately).
Custom Tags
You can assign to any project or task a custom text tags.
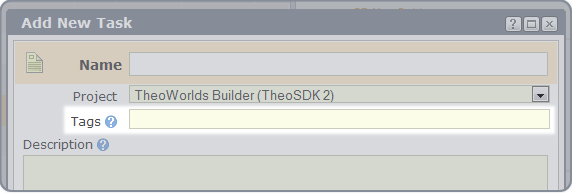
Tags can be used for anything - you can use them as cross-project and cross-group categories, for example. And, since multiple tags per project/task are supported in gives you the extra flexibility.
Tags can be color coded to easily distinguish them visually. You can also filter the projects/tags by one of multiple tags at a time:
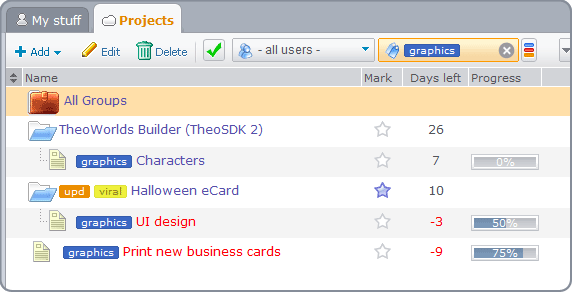
Tags are a great way to cross-categorize projects and tasks and to make them stand out visually.
You can also reposition the custom tags to the right of the project/task names or hide them all together.
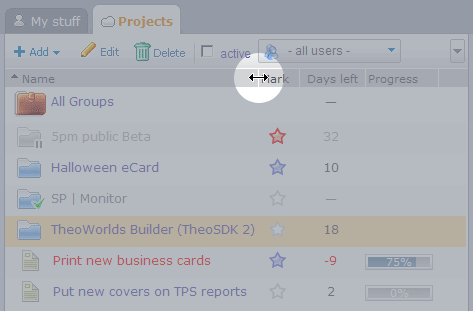
"Mark" column
"Mark" is an additional column you can have in your main view (if you don't see it, check the Customization section). It contains a star image that can be used to mark a projects or a tasks.
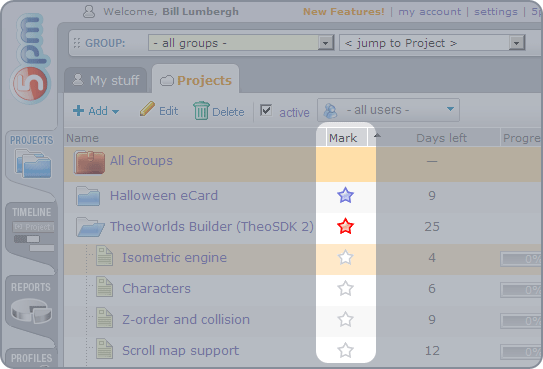
Simply click on the star image to change its color. Three colors are available. This is a purely visual feature, for marking the projects and tasks. It can be used in any way you an your team decides (ex: you can mark important tasks as bugs with a red star).
Customization
You can customize your main view in different ways:
You can resize the left/right panels by dragging the separator line between them:
You can resize the columns in the same way:
You can also hide and show columns - this option is accessed through the right click on the columns header.
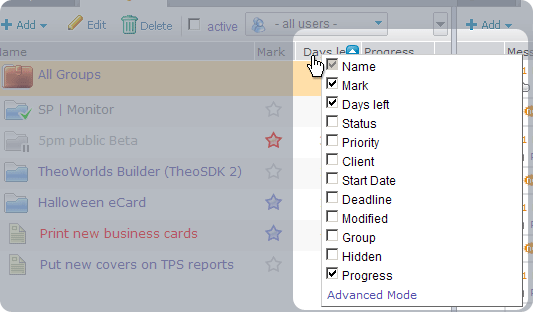
You can also re-order the columns through the "Advanced Mode" (the link is at the bottom of the columns list) or by simple dragging them to the new location.
Those are individual settings (they are remembered for each use separately).
Quick project / task info
If you place the mouse cursor over the project or task icon and wait for a bit, it will display a popup window with short info about it.

Other settings
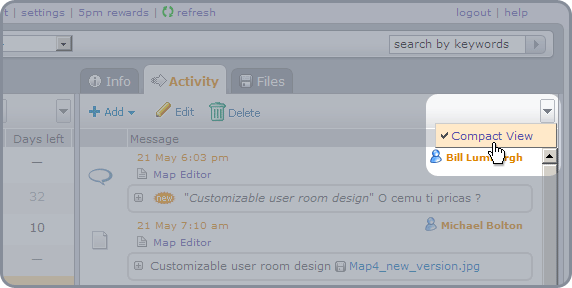
In the right panel you have the option to switch to the Compact View. In this view all the messages are folded to show just the first line:
Those are individual settings (they are remembered for each use separately).