
Using Projects / Tasks / Activities
How is information organized in 5pm
Information in 5pm is organized into a few categories.
5pm Data Structure
| Group | Groups can be used to group together Projects and Single Tasks (tasks outside projects). For example,
you can group together projects by company departments or types.
Initially, there are no Groups, and all Projects are placed into the common "All Groups" area. As the number of Projects grows, you may consider splitting them into project Groups. |
|
| Project | Projects can contain multiple tasks that need to be completed in order to finish the project. A project can have one of these statuses: "open", "on hold" and "done". Each project has a Project Team and can have one or many Clients attached to it. | |
| Task | Tasks are normally added into projects, but you can also create tasks outside projects (Single Tasks).
Single Tasks can be used when you don't want a whole project created for a job.
A task can have one of these statuses: "open", "on hold" and "done". Each task can have a Task Team attached to it that can be different from the parent Project Team. This allows for extra flexibility. You can add to individual tasks only the sub-team needed for it, not the whole project team. You can even add to it people that are not part of the whole project. This allows for more efficient filtering of yours or other users tasks. Also, it makes the email notifications more targeted — you can notify the whole Project Team, or just the Task Team, depending on the situation. |
|
| Message | Messages are an universal tool for exchanging ideas, comments and notes. You can add them to a Project or a Task. You can also attach files to a Message. | |
| Progress/Time | Progress Notes are a way of reporting progress and/or time for tasks (not projects). Each Progress Note may contain the description, the % of task completion (the only mandatory field) and the hours invested into it. The % is just an estimate, to communicate to the team the task's overall progress. The latest % overwrites the previous ones. Adding a 100% Progress Note closes a task. | |
| People (Users) | There are four different user profiles: Administrators, Users, External users and Clients. The first three categories can be added to a Project Team or a Task Team and they have different security levels. Clients are a separate type of users — they can be assigned to the whole project level (by adding them to the Project Team). |
User Profiles and Security Levels
 Check the Video Tutorial: Adding your Team 3 mins
You can control who can see or edit what with a combination of user security level and project/task/messages flags (like the "hide from non-team users" in projects/tasks and "hide from Clients" in messages).
Security Levels
| Administrator | Administrators are users with unlimited rights — they can see and edit any information in your 5pm
account. They can also access global 5pm settings and the subscription details. Usually, they are
reserved for managers in bigger teams, though in smaller teams it is also common to make everybody an Administrator.
The first user that opens the 5pm account becomes its main Administrator. This main Administrator is used by us as the main point of contact for this 5pm account — make sure you use a valid email and add support@5pmweb.com to your trusted email addresses. |
|
 |
User | This is the most common type of users, recommended for all your team members. Their rights:
|
| External User | External Users are very similar to Users, but are more limited, and they can only see
projects/tasks assigned to them. Basically, External Users function like Users in a scenario
when ALL projects and task would be flagged as "hide from non-team users"):
|
|
| Client | Clients are different from all the other types of users. As the name suggests, they are
designed for somebody to keep track of their projects, but not for the ones working on them. Clients are directly attached to whole projects (not individual tasks) and
can see just those projects (and anything inside them and inside their tasks, besides the hidden
messages and files) and add comments. Clients' rights:
Basically, Clients can see their projects in a read only mode, but can comment and post files. Unlike other users, Clients do not count toward your plan. You can have an
infinite number of clients on any plan.
|
Working with Projects and Tasks
Check the Video Tutorial: Adding Projects and Tasks 3 mins
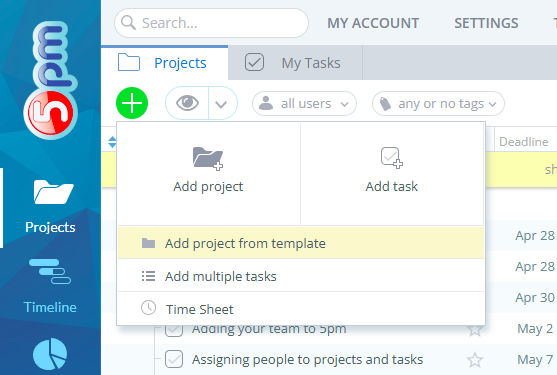
You have to be in the main view ("Projects") and the "Projects" tab has to be selected in the left panel. Click the "+" button on the top of the left pane and select "Add Project":
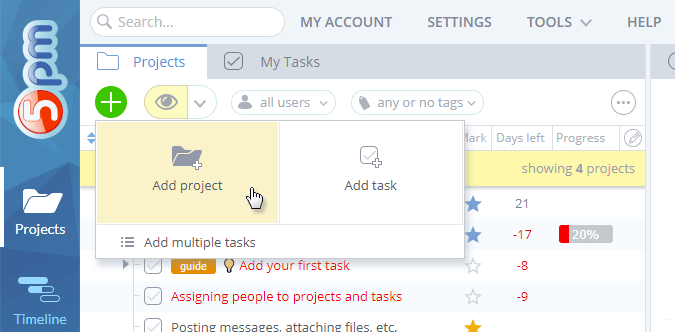
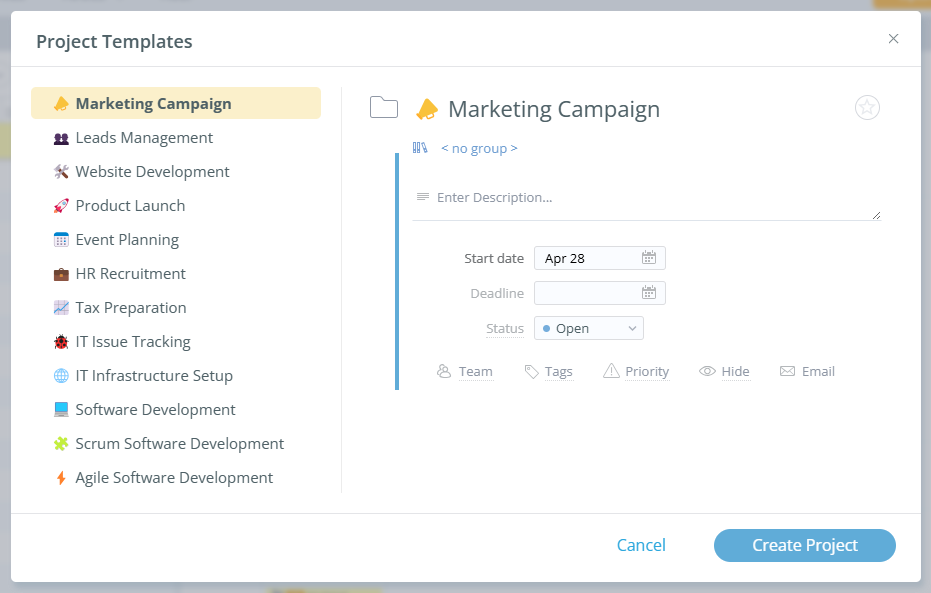
New project window will appear in the right panel:
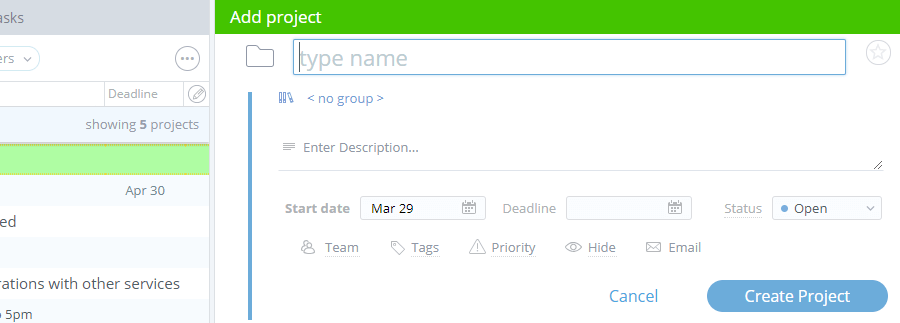
Only the project Name and Start Date (defaults to "today") are required, so you can just enter the name and click "Create Project" or use the CTRL+Enter shortcut.
But there are other fields available — you can set the deadline, assign the team and so on:
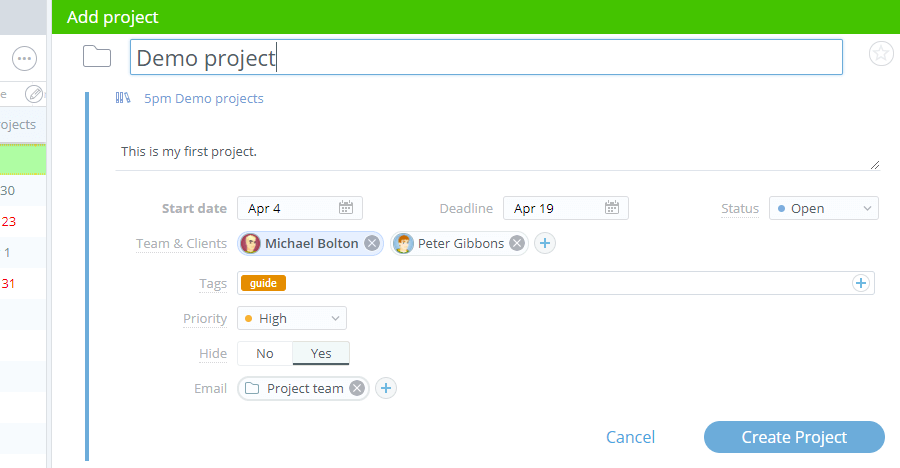
Below is the list of all the available project fields:
- Name
- Group — The project can be attached to a group. The current group is pre-selected. Initially, all projects are created outside any groups ("All Groups" view).
- Description
- Tags — custom tags (select from existing ones or add new ones on the fly).
- Priority — select: "Low", "Normal", "High" or "Urgent".
Project and Task Priorities can be customized — just contact our support about it. - Status — select: "Open" (default status), "On Hold" (temporarily stopped) or "Done" (closed).
Project and Task Statuses can be customized — just contact our support about it. - Start Date — set to "today" by default.
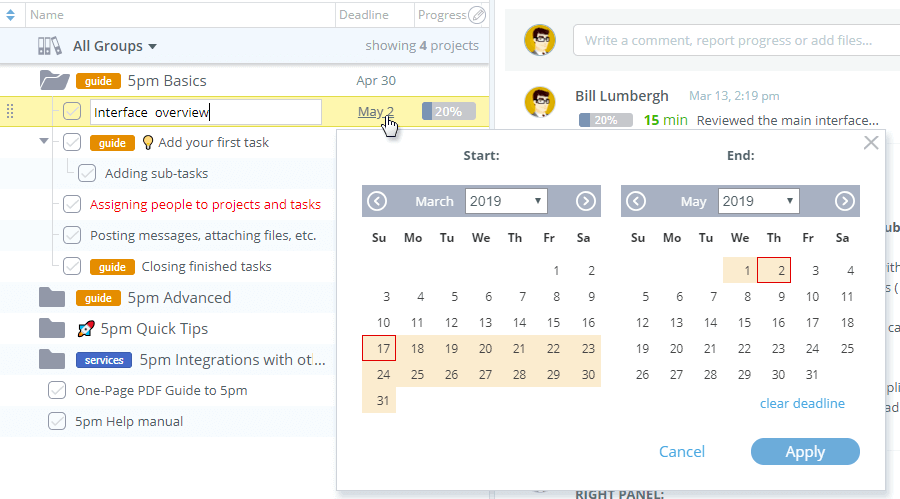
- Deadline — scheduled end date (empty by default)
- Team and Clients — assign project team members and Clients to the project. You can highlight certain team members by clicking on their names (it will mark them in bold).
- Hide (from non-team members) — Hide this project from Users that are not part of the project's team. Note that people with Admin security level can see all the projects, including the hidden ones. The project creator can see all the projects he/she created, even hidden ones.
- Notify by Email — send email notifications to the project team, clients or specific people.
Similarly, you can add a new Task:
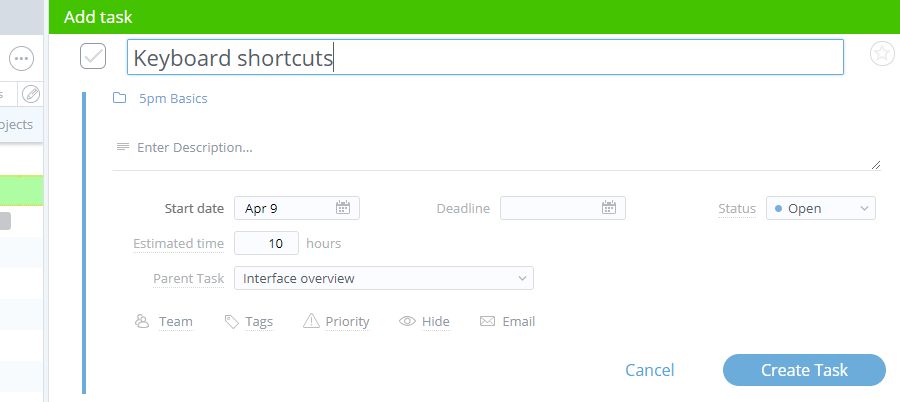
Task fields are a bit different from the project ones:
- Name, Description, Tags, Priority, Status, Start Date, Deadline work exactly the same.
- Project, Group — parent Project, or, if none is selected (for a single task outside projects) then the parent Group. Initially, all single tasks are created outside any groups ("All Groups" view).
- Parent Task — a task can also be a sub-task / dependent task of another one. You can have multiple levels of task dependencies.
- Estimated time — estimated time it would take to complete the task.
- Team — task team can be different from the project team, which allows for extra flexibility.
- Hide (from non-team members) — same as with projects, this filter hides this task from Users that are not part of the task's team. If a project is hidden from the user, but there is a task inside that project not hidden from him/her, then the user will be able to see that parent project.
- Notify by Email — same as with the project, but because project and task teams can be different, you can decide if you want to notify the whole project team, or just the task team, or just any specific people.
Note: The mandatory fields are marked in bold.
Sub-tasks can help you break main tasks into smaller ones, or create task dependencies.
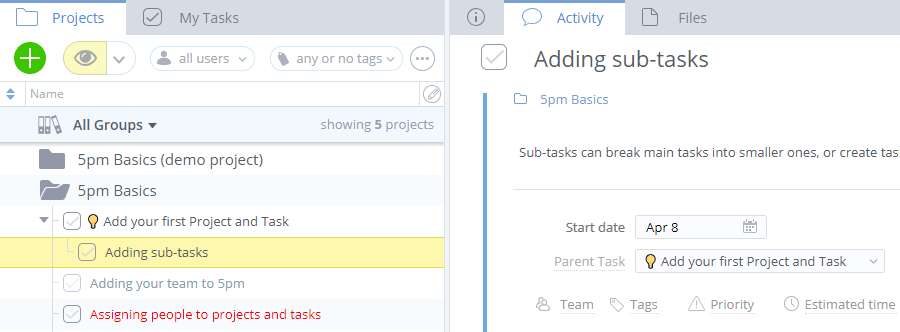
To create a sub-task you can edit its "parent" field or simply drag it into its parent task. You can have multiple levels of sub-tasks, creating deep hierarchies, if needed.
One parent task can have multiple dependent tasks. One dependent task can have just one parent task.
Since the dependent tasks can start before or after the parent's task End Date (Deadline), you can create flexible schedules, with dependent tasks starting before the parent task is completed (ex: work can be started on "Website copy update" task, while "Translations" task is not finished yet) or some time after the parent task was completed (ex: "Paint the wall" needs to start some time after the "Apply primer" task was completed). Those are sometimes called "lag" and "lead".
This feature can be disabled via Global Settings.
In the main view the dependent tasks are grouped under their parent tasks and this grouping is maintained despite the sort order. When the parent task is not present on the screen (hidden for some reason), its sub-tasks are displayed as if they do not have a parent task.
The Timeline view makes it easy to see all the task dependencies. Moving or resizing the parent tasks in the Timeline will also move the dependent tasks, making re-scheduling a breeze:

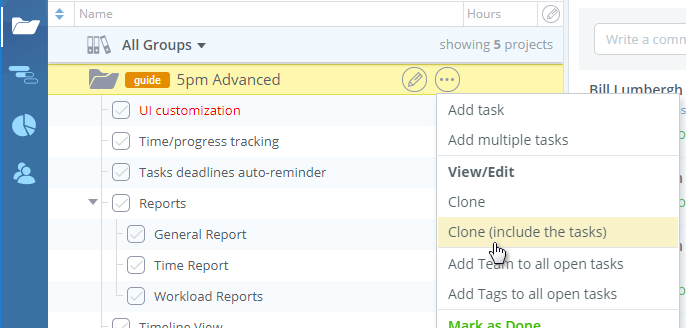
You can also clone existing projects and tasks, using any of them as a template for new ones. This option is available via the contextual menu.
You can even clone entire projects with all its tasks, or a parent task with its sub-tasks:
It will open the new project/task window, so you will be able to modify any fields before cloning is done.
When cloning, the dates are automatically adjusted. The Start Date is set to "today" and the durations (the interval between start and end dates) of projects and tasks are maintained. The status is defaulted to "Open", but other field values are copied.
You can create new projects faster using templates:
Select from a list of popular project types:
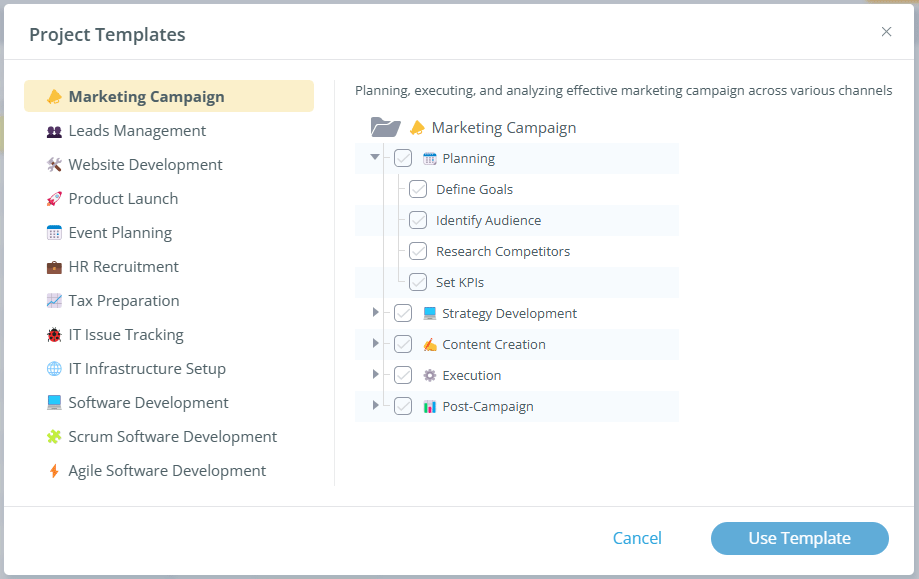
Adjust the project setting, and the tasks and sub-tasks will be added to it automatically:
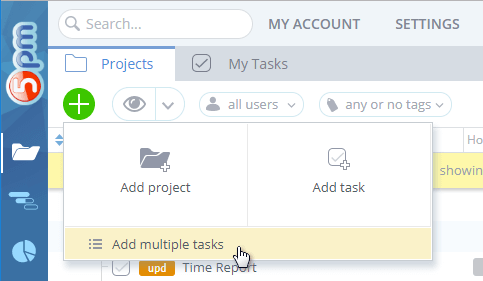
To add multiple tasks at once, use the "+" menu on the top of the left panel or the project contextual menu:
It will open a popup window where you can enter the tasks list. Use the TAB button to move between fields quickly:
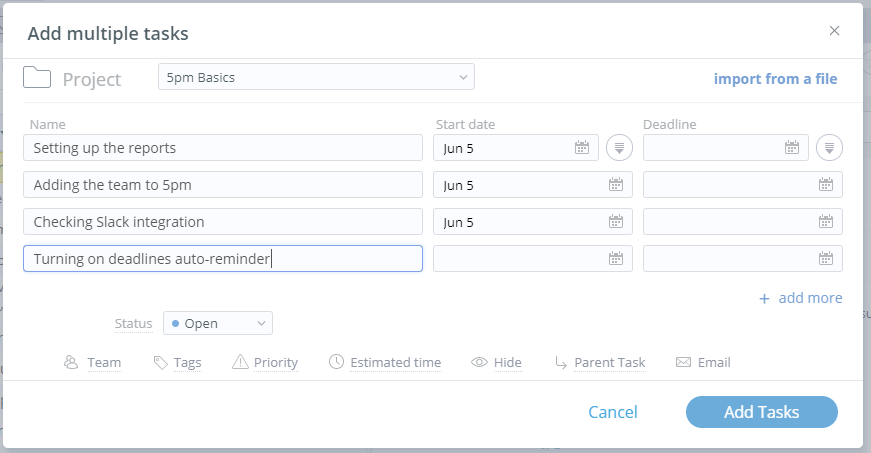
The buttons by the Start date and Deadline fields for the first task allow you to apply those dates to the rest of the tasks.
To import tasks from a CSV or Excel file, check Import data into 5pm.
There are a few ways to edit Projects and Tasks. For quick edits, you can modify the fields directly in the projects/tasks list in the left panel, by clicking on them:
Clicking on the task icon will close it.
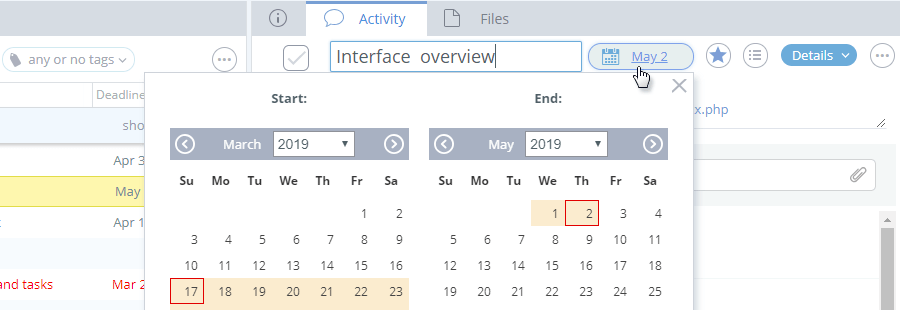
Similarly, you can quickly close the project/task, mark it with a star or change its name, description or deadline by clicking on those fields in the project/task header on the top of the right panel.
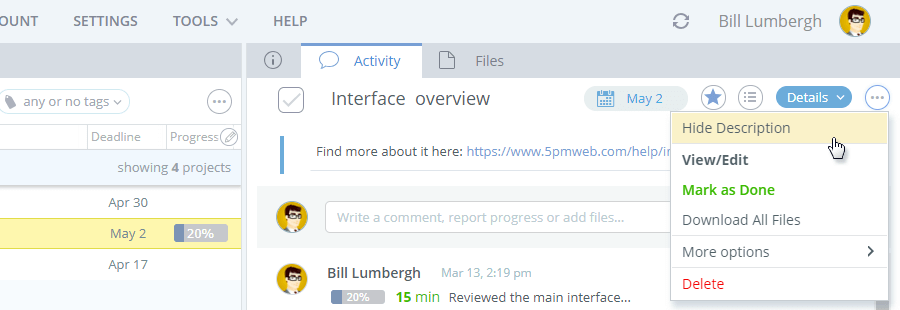
Description is not displayed by default in the project/task header. But you can add it there via the right panel menu:
In the majority of the web browsers you can resize the default Description field size.
For the full project/task editing, you can either click on the edit menu of the project/task selected in the left panel, or use the "Details" button in the header of the right panel to unfold the form:

Do not forget to save the opened form after you make the changes, even if the changes are done in the header area.
To edit multiple projects/tasks, simply multi-select them via holding the CTRL or ⌘ key on your keyboard and clicking on projects/tasks:
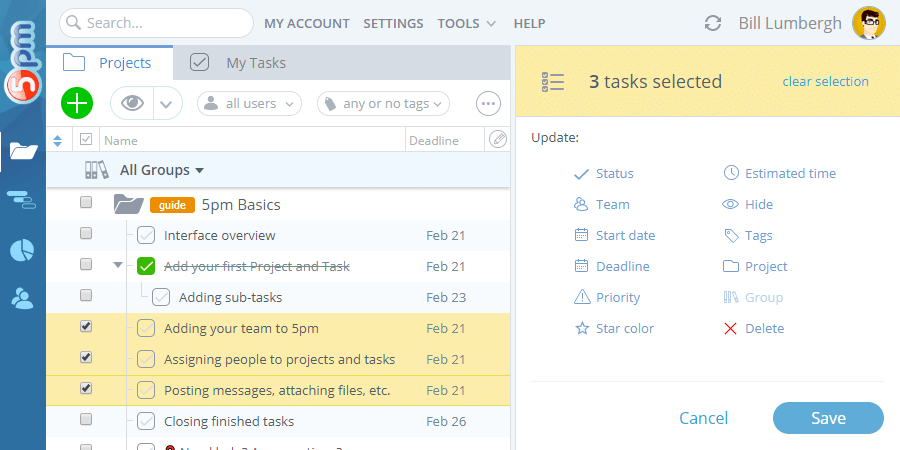
You can also hold the SHIFT key to select all projects/tasks in between the first and second one selected.
You can also add the "Select" column to the left panel, to be able to select projects/tasks by clicking on checkboxes in front of them.
You can change the status, team, deadline, etc. You can also delete multiple projects/tasks ("restore" feature is available, in case you deleted something by mistake).
You can also re-select the previously selected project/tasks.
Managing Deadlines
While deadlines are optional, setting deadlines at the project and task level can help you manage your workload better.
When a project or a task is closed, its deadline is set to the closing date (the actual date when the project/task ended).
It means that, if there was a deadline already present, it will be overwritten by the new closing date. In this case, the original value is saved into a separate field called Original Deadline (you can add it to your screen via Interface Customization):
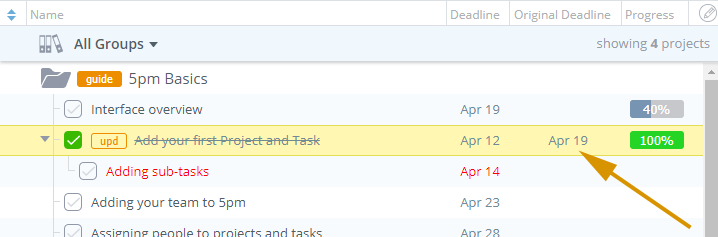
Having both — the original and the real closing dates — allows you to compare them and see clearly if the project/task was completed on time or not.
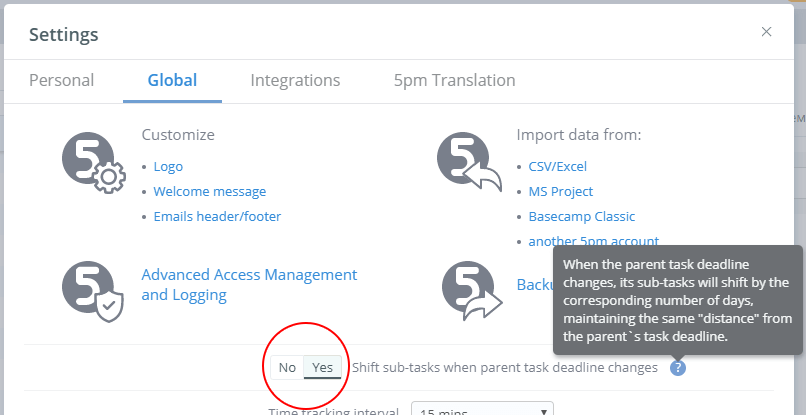
In case of tasks with sub-tasks, the sub-tasks will shift if the parent task deadline changed — it means, closing a parent task may cause the automatic shifting of its sub-tasks. This auto-shifting can be turned off via Global Settings. Read more about it in Sub-tasks section.
The overdue projects and tasks are marked in red, but there are other ways to track and manage your deadlines:
- Deadline Reminders to stay on top of your tasks (you have to enable them, as it is turned off for each user by default)
- Multi-edit to change deadlines for a set of tasks or close them all at once
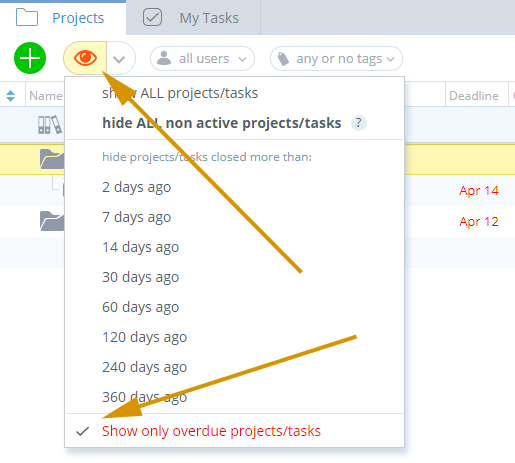
- "View: Show Overdue" filter in the main view:
- My Tasks view to sort tasks (yours or anybody's else) by deadlines, across all projects
- Timeline view to easily move and re-schedule whole projects or a set of tasks/sub-tasks
- Automation to set triggers on upcoming task deadlines or when a deadline is set/changed
- General Report — select as the Date range "Overdue" to get the list of projects and tasks that are overdue
- Daily Workload Report to see how the upcoming deadlines impact the workload
- Calendar Integration to display 5pm tasks and/or their deadlines in your favorite calendar (Outlook, Gmail, etc.). Alternatively, you can use the 8am Calendar that integrates better with 5pm — you can even re-schedule and close tasks directly in 8am
Messages and Files
Check the Video Tutorial: Adding Messages, Files and Progress Notes 4 mins
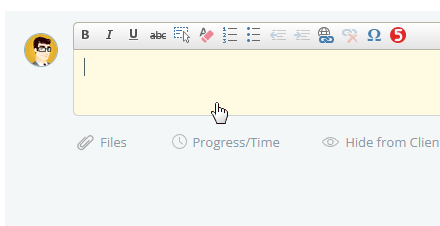
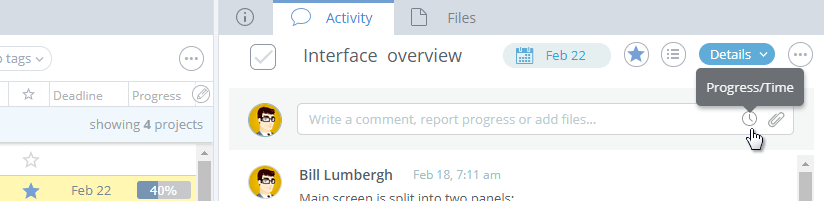
To post a message/comment or a file to a project or a task, you have to select it first in the left panel. The comment window is on the top on the right panel (Activity tab):
You can use text formatting, bullet points, links, etc.:
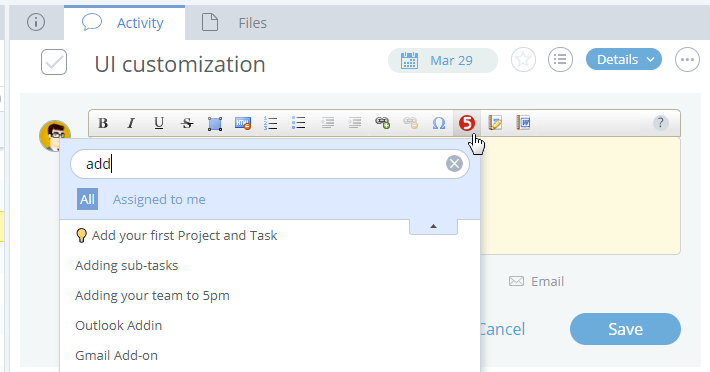
You can even post links to other 5pm tasks into comments:
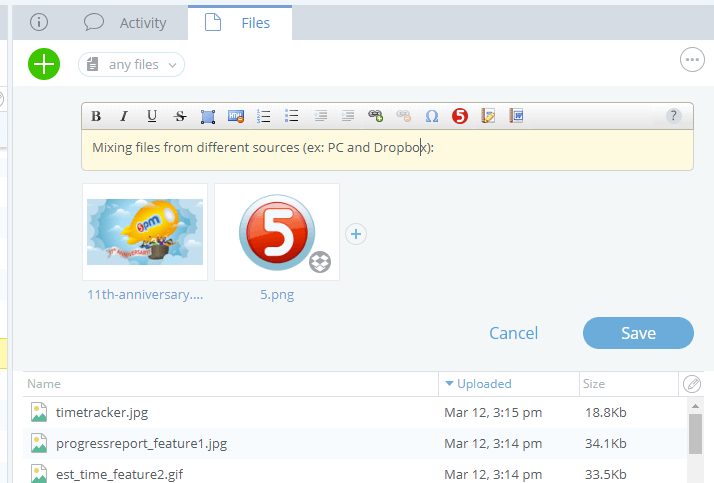
You can easily attach files to your comments:
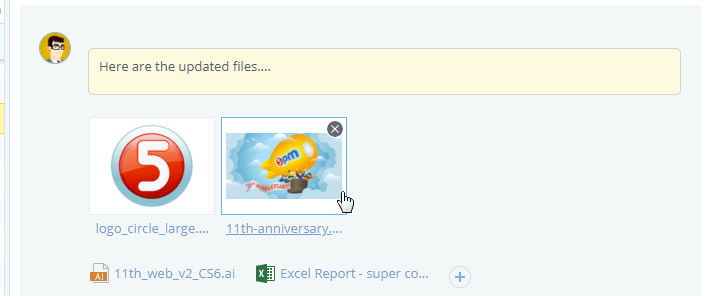
You can also simply drag-and-drop the files into the right panel to upload them:

And you can paste images from your clipboard with CTRL+V (Command (⌘) +V) — for example, screenshots.
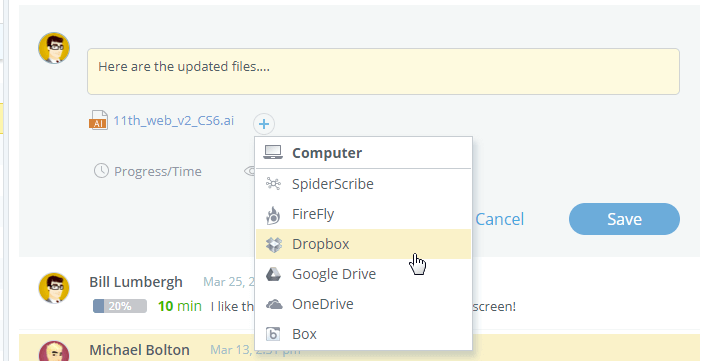
Besides attaching files from your computer, you can also link files from the popular cloud storage services:
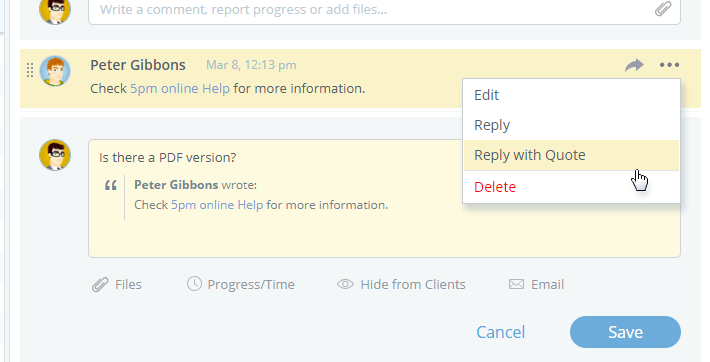
When replying to another comment, you can also include quotes from it:
Messages can be hidden from Clients. Also you can send email notifications to the project team, task team, clients and/or specific people:
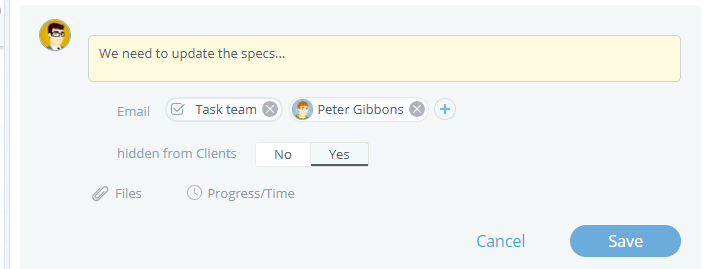
You can also use the @mention feature to automatically select who to email:
Your teammates can answer to the email notifications from 5pm the same way they answer any other email, and their reply will be logged back into 5pm as another comment — read more about Email Integration.
Files can also be added via the Files tab:
Only Administrators can modify other people's comments. It means a group of people with Admin rights can collaborate on the same comments, crossing each other's bullet points, adding to them, etc.
Progress Notes
Progress Notes are a special type of comments, that can contain extra information about the progress made and time spent on a task.
Progress Notes usage is optional. Teams that simply have tasks either open or closed and do not care about the %, and teams that do not track time will not need to use Progress Notes.
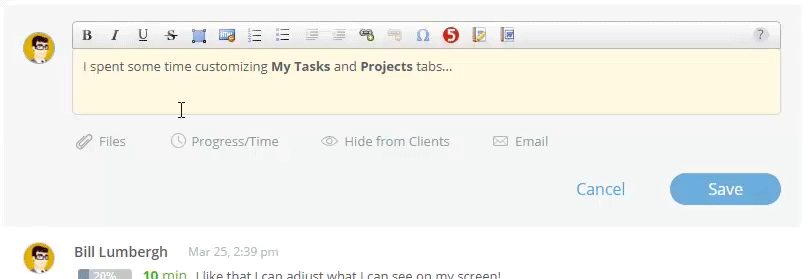
Progress Notes specific fields contain such information as the % of the task completion (it is purely for communication purposes, to let teammates know where you are with the task) and time spent on a task. Either is optional. You can also post the Progress Note to a different date (instead of the date/time of its posting), allowing you to report hours spent on different days:
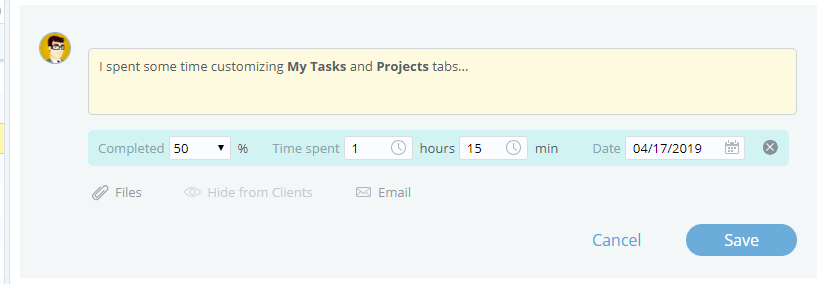
You can also post comment (optional) with your Progress Note, attach files to it and send email notifications about it.
There is also a shortcut for adding Progress Notes — the icon at the end of the unfolded message form:
You can post as many progress notes to a task as you want.
You can also simply close a task, without any Progress Notes (the simplest way is be clicking the task icon in front of its name).
You can not hide Progress Notes from Clients, as the Progress Notes can change the task status.
Progress Notes can be a useful way to communicate the progress or the time spent on a task. They can also be added via the Time Tracking desktop widget.